03. Landing Page
You're now ready to start create your landing page using Vue3. Here we will see how to integrate Vue3 with flask app using CDN link.
Basic Layout
Let's create these folders. static and templates. Here static and templates are the default folders of flask. From templates we serve our html files and through static we serve our css and js files.
Here is the folder structure of our project:
grocery-app-mad2/
├── .env
├── backendjobs
    └── admin.py
    ...
├── instance
    └── project.sqlite3
├── static
    └── assets
        ...
    └── components
        └── CartCompo.js
    └── router
        └── index.js
    └── store
        └── index.js
    └── views
        └── HomeView.js
        ...
    └── style.css
├── templates
    └── index.html
├── .gitignore
├── app.py
├── database.py
├── README.md
├── requirements.txt
We may add new folders or files based on our requirements.
Vue Integration
We will create an index.html file inside templates folder and include the CDN link for Vue3.
html filename=templates/index.html

<!DOCTYPE html>
<html lang="en">
  <head>
    <meta charset="UTF-8" />
    <meta name="viewport" content="width=device-width, initial-scale=1.0" />
    <title>Eat Fresh</title>
    <script src="https://unpkg.com/vue@3/dist/vue.global.js"></script>
  </head>

  <body>
    <div id="app">${ msg }</div>

    <script type="module">
      const { createApp } = Vue;
      const app = createApp({
        delimiters: ["${", "}"],
        data() {
          return {
            msg: "Hello Vue!",
          };
        },
      });
      app.mount("#app");
    </script>
  </body>
</html>
Note We use the
delimitersproperty to avoid conflicts with Flask'sjinja2template engine, which uses{{ }}syntax. By setting custom delimiters${ }, we enable client-side rendering with Vue.js without interference.
Now to return this template as response we have to create a route in the flask app.py file.
python filename=app.py

from flask import (
    Flask,
    render_template
)

app = Flask(__name__)


@app.route('/app/', defaults={'page': ''})
@app.route('/app/<path:page>')
def hello_world():
    return render_template("index.html")


if __name__ == "__main__":
    app.run(debug=True)
The index.html file serves as the main entry point for rendering all the JavaScript files. Similar to how app.py serves as the central script in which various Python modules for routing and database operations are imported, we will follow a comparable approach with .js files, importing all necessary JavaScript components into this file.
Note We will implement Catch-all route for undefined paths from the browser to the flask server. We have added the line
@app.route('/app/', defaults={'page': ''})
@app.route('/app/<path:page>')
. It catch all the routes starts with /app/ and returns the index.html file. I will tell you the reason later.
Routing
The way we create routes in a Flask application or the way we have created different paths/routes in our MAD-I application, we have routings in Vue for frontend. Now we no more use backend routing for redirecting to different pages. Instead, the backend/Flask server will serve the purpose of database interaction and returning response only with the requested data. Here we use vue-router for routing pages in the client side itself. We will create all the routes in the index.js file inside the router folder of the static folder.
js filename=static/router/index.js

import HomeView from "../views/HomeView.js";

const router = VueRouter.createRouter({
  history: VueRouter.createWebHistory(),
  routes: [{ path: "/app", component: HomeView }],
});
export default router;
Now we have to define the HomeView component to be used in the index.js file. In this CDN approach, we will be using .js files for
creating components and the whole Vue code.
Creating Components
The typical structure of a Vue component file that we will be creating is:
const HomeView = {
  name: 'HomeView',
  template: `
    <div>
      <header class="bg-success text-white text-center py-3">
          <h1>Welcome to Eat Fresh</h1>
      </header>
      <div></div>
      ...
      <div></div>
      <section></section>
    </div>
  `,
  data() {
    return {
      // Data properties of the application. All the data related to this page goes here.
    };
  },
  methods: {
    method1() {
      // Method 1 logic
    },
    method2() {
      // Method 2 logic
    },
  },
  computed() {
    // Computed properties. derived from the data of the application.
  },
  watch() {
    // Watch properties. Watch for changes in the data of the application.
  },
  mounted() {
    // Mounted logic. Initialize data here before rendering the template.
  }
};
export default HomeView;
Note The above style is called the Options API and is the recommended way to create Vue components for beginners. Vue also provides an alternative style called the Composition API, which we will not explore in this tutorial.
We will have similar structure for each Vue component.
Let's create our first component.
The HomeView component represents the landing page of the application.
js filename=static/views/HomeView.js

const HomeView = {
  name: "HomeView",
  template: `
  <div>
    <header class="bg-success text-white text-center py-3">
        <h1>Welcome to Eat Fresh</h1>
    </header>

    <section class="container mt-4">
        <div class="text-center">
            <h2>Explore a World of Freshness</h2>
            <p class="lead">Discover a wide range of fresh and quality groceries delivered to your doorstep.</p>
            <p class="lead">Start your shopping journey now!</p>

            <!-- Visit Now Button with Tooltip -->
            <button type="button" class="btn btn-primary btn-lg" data-bs-toggle="tooltip" data-bs-placement="bottom" title="Please login or register to continue.">
                Visit Now
            </button>

            <!-- Login and Register Buttons -->
            <div class="mt-3">
                <a class="btn btn-outline-dark btn-sm" @click="login">Login</a>
                <a class="btn btn-outline-dark btn-sm" @click="register">Register</a>
            </div>
        </div>
    </section>
  </div>
`,
  methods: {
    login() {
      // Logic to navigate to the login page
    },
    register() {
      // Logic to navigate to the register page
    },
  },
  mounted() {
    // Code to be executed when the component is mounted.
  },
};
export default HomeView;
Styling
We will be using Bootstrap 5getbootstrap.com for styling our application. I will also create a custom style.css file for styling our application using core css.
Let's create the css file.
css filename=static/style.css

body {
    display: flex;
    min-height: 100vh;
    flex-direction: column;
}
Also add the style.css and CDN link of the bootstrap in the index.html file.
html filename=templates/index.html

<!DOCTYPE html>
<html lang="en">

<head>
  <meta charset="UTF-8" />
  <meta name="viewport" content="width=device-width, initial-scale=1.0" />
  <!-- [tl! add:start] -->
  <link href="https:/cdn.jsdelivr.net/npm/bootstrap@5.3.0/dist/css/bootstrap.min.css" rel="stylesheet" />
  <script src="https:/cdn.jsdelivr.net/npm/bootstrap@5.3.0/dist/js/bootstrap.bundle.min.js"
    crossorigin="anonymous"></script>
  <title>Eat Fresh</title>
  <link rel="stylesheet" href="../static/style.css" />
  <!-- [tl! add:end] -->
  <script src="https://unpkg.com/vue@3/dist/vue.global.js"></script>
  <script src="https://unpkg.com/vue-router@4.0.15/dist/vue-router.global.js"></script>
</head>

<body>
  <div id="app">${ msg }</div>
  <!-- [tl! remove] -->
  <div id="app">
    <!-- [tl! add:start] -->
    <component is="router-view"></component>
  </div>
  <!-- [tl! add:end] -->
  <script type="module">
    import router from "../static/router/index.js"; // [tl! add:start]
    const { createApp } = Vue;
    const app = createApp({
      // [tl! remove:start]
      delimiters: ["${", "}"],
      data() {
        return {
          msg: "Hello Vue!",
        };
      },
    }); // [tl! remove:end]
    //[tl! add: start]
    const app = createApp({});
    var tooltipTriggerList = [].slice.call(
      document.querySelectorAll('[data-bs-toggle="tooltip"]')
    );
    var tooltipList = tooltipTriggerList.map(function (
      tooltipTriggerEl
    ) {
      return new bootstrap.Tooltip(tooltipTriggerEl);
    }); // [t1! add:end]
    app.mount("#app");
  </script>
</body>
</html>
This snippet of code is being used for adding tooltip feature:
var tooltipTriggerList = [].slice.call(
    document.querySelectorAll('[data-bs-toggle="tooltip"]')
);
var tooltipList = tooltipTriggerList.map(function (tooltipTriggerEl) {
    return new bootstrap.Tooltip(tooltipTriggerEl);
});
Configuration Database and Models
Since we are using SQLite as our database, we will use Flask-SQLAlchemyflask-sqlalchemy.palletsprojects.com/en/latest/ to create the database and models. First we will install Flask-SQLAlchemy using the following command:
pip install Flask-SQLAlchemy
Next, we will configure the database and models for our application. Initially, we will create a User table to store user data. As we progress, we will populate the tables in the database.
python filename=database.py

from flask_sqlalchemy import SQLAlchemy

db = SQLAlchemy()


class User(db.Model):
    __tablename__ = 'user'
    id = db.Column(db.Integer, primary_key=True, autoincrement=True)
    email = db.Column(db.String(100), unique=True)
    password = db.Column(db.String(100))
    name = db.Column(db.String(1000))
    role = db.Column(db.String)
    doj = db.Column(db.DateTime)
    loginAt = db.Column(db.DateTime)
    image = db.Column(db.BLOB)
Note Deciding the columns depends on the requirements of your application. You can add or remove columns as per your needs. As a beginner, it's okay to make mistakes. You will learn through your mistakes, so be patient and consistent. Just remember to keep your code organized and follow best practices.
Now we will import and configure the database in the app.py file. Also we will create the tables through the application. Please add the following code in the app.py file:
python filename=app.py

from flask import (
    Flask,
    render_template
)
from database import (  # [t1! add:start]
    db,
    User
)  # [t1! add:end]
# Hashing password is a standard practice.
from werkzeug.security import generate_password_hash  # [t1! add:end]

app = Flask(__name__)
# This is save the sqlite in the default location.
# It create instance folder and save the sqlite file in it.
# [t1! add:start]
app.config['SQLALCHEMY_DATABASE_URI'] = 'sqlite:///project.sqlite3'
db.init_app(app)
app.app_context().push()
db.create_all()
# inserting admin creadentials
exist_admin = User.query.filter_by(role='admin').first()
if not exist_admin:
    the_admin = User(email="sachin@gmail.com", name="Sachin Kumar",
                     role="admin", password=generate_password_hash(
                         "password"))
    db.session.add(the_admin)
    db.session.commit()  # [t1! add:end]


@app.route('/app/', defaults={'page': ''})
@app.route('/app/<path:page>')
def hello_world():
    return render_template("index.html")


if __name__ == "__main__":
    app.run(debug=True)
Note The line
app.app_context().push()in your code is used to explicitly create and push an application context to make Flask's app-specific global variables (like current_app and g) accessible outside a request context. You can read more about it hereflask.palletsprojects.com/en/2.2.x/appcontext/.
Login and Register
Now we will create a login and register page(components) for our application. We will create two .js
files in the views folder.
js filename=views/LoginCompo.js

const LoginCompo = {
  name: "LoginCompo",
  template: `
    <div class="row justify-content-center m-3">
      <div class="card bg-light" style="width: 18rem;">
        <div class="card-body">
          <div class="d-flex justify-content-end">
            <!-- Cross button to close the card -->
            <button type="button" class="btn-close" aria-label="Close" @click="closeCard"></button>
          </div>
          <h5 class="card-title">Sign In</h5>
          <form @submit.prevent="submitForm">
            <div class="mb-3">
              <label for="exampleInputEmail1" class="form-label">Email address</label>
              <input type="email" v-model="email" class="form-control" id="exampleInputEmail1">
              <div v-if="message" class="alert alert-warning">
                {{message}}
              </div>
            </div>
            <div class="mb-3">
              <label for="exampleInputPassword1" class="form-label">Password</label>
              <input type="password" v-model="password" class="form-control" id="exampleInputPassword1">
            </div>
            <div class="mb-3">
              <label for="remember">Remember Me</label> <input id="remember" name="remember" type="checkbox"
                v-model="remember" value="y">
            </div>
            <button type="submit" class="btn btn-outline-primary">Login</button>
          </form>
        </div>
      </div>
    </div>
  `,
  data() {
    return {
      email: "",
      name: "",
      password: "",
      role: "",
      remember: "",
      message: "",
    };
  },
  methods: {
    closeCard() {
      if (this.$route.path != "/")
        this.$router.push("/");
      }
    },
  },
};
export default LoginCompo;
js filename=views/RegisterCompo.js

const RegisterCompo = {
  name: "RegisterCompo",
  template: `
    <div class="row justify-content-center m-3 text-color-light">
      <div class="card bg-light" style="width: 18rem;">
        <div class="card-body">
        <div class="d-flex justify-content-end">
          <!-- Cross button to close the card -->
          <button type="button" class="btn-close" aria-label="Close" @click="closeCard"></button>
        </div>
          <h5 class="card-title">Sign up</h5>
          <form @submit.prevent="submitForm">
            <div class="mb-3">
              <label class="form-label">Email address</label>
              <input type="email" v-model="email" class="form-control">
              <div v-if="message" class="alert alert-warning">
                {{message}}
              </div>
            </div>
            <div class="mb-3">
              <label class="form-label">Your Name</label>
              <input type="text" v-model="name" class="form-control" >
            </div>
            <div class="mb-3">
              <label class="form-label">Password</label>
              <input type="password" v-model="password" class="form-control">
            </div>
            <div class="mb-3">
              <select class=" input is-large" v-model="role" required>
                <option class="input is-large" value="user">User</option>
                <option class="input is-large" value="manager">Manager</option>
              </select>
            </div>
            <button type="submit" class="btn btn-outline-primary">Sign up</button>
          </form>
        </div>
      </div>
    </div>
  `,
  data() {
    return {
      email: "",
      name: "",
      password: "",
      role: "",
      message: "",
    };
  },
  methods: {
    closeCard() {
      if (this.$route.path != "/") {
        this.$router.push("/");
      }
    },
  },
};
export default RegisterCompo;
Here the thing that you should notice is this.$route.path and this.$router.push('/'). Clearly the first one is the path of the current route and the second one is the path of the route you want to go to.
It will throw error if you try to push to the same route that you are currently on, so you need to check if the current route is the same as the route you want to go to.
Now we need to use this two components in the index.html file:
js filename=static/router/index.js

import HomeView from "../views/HomeView.js";
import LoginCompo from "../views/LoginCompo.js"; // [tl! add:start]
import RegisterCompo from "../views/RegisterCompo.js"; // [tl! add:end]
const router = VueRouter.createRouter({
  history: VueRouter.createWebHistory(),
  routes: [
    { path: "/app", component: HomeView },
    { path: "/app/login", component: LoginCompo }, // [tl! add:start]
    { path: "/app/register", component: RegisterCompo }, // [tl! add:end]
  ],
});
export default router;
Also we need to modify the code in the static/views/HomeView.js file to display the login and register buttons:
js filename=static/views/HomeView.js

const HomeView = {
  name: "HomeView",
  template: `
    <div>
      <header class="bg-success text-white text-center py-3">
        <h1>Welcome to Eat Fresh</h1>
      </header>
      <section class="container mt-4">
        <div class="text-center">
        <h2>Explore a World of Freshness</h2>
        <p class="lead">
          Discover a wide range of fresh and quality groceries delivered
          to your doorstep.
        </p>
        <p class="lead">Start your shopping journey now!</p>

        <!-- Visit Now Button with Tooltip -->
        <button type="button" class="btn btn-primary btn-lg" data-bs-toggle="tooltip" data-bs-placement="bottom"
          title="Please login or register to continue.">
          Visit Now
        </button>

        <!-- Login and Register Buttons -->
        <div class="mt-3">
          <a class="btn btn-outline-dark btn-sm" @click="login">Login</a>
          <a class="btn btn-outline-dark btn-sm" @click="register">Register</a>
        </div>
        </div>
      </section>
    </div>
  `,
  methods: {
    login() {
      // [t1! add:start]
      if (this.$route.path !== "/login") {
        this.$router.push("/login");
      } // [t1! add:end]
    },
    register() {
      // [t1! add:start]
      if (this.$route.path !== "/register") {
        this.$router.push("/register");
      }
    }, // [t1! add:end]
  },
  mounted() {
    // Code to be executed when the component is mounted.
  },
};
export default HomeView;
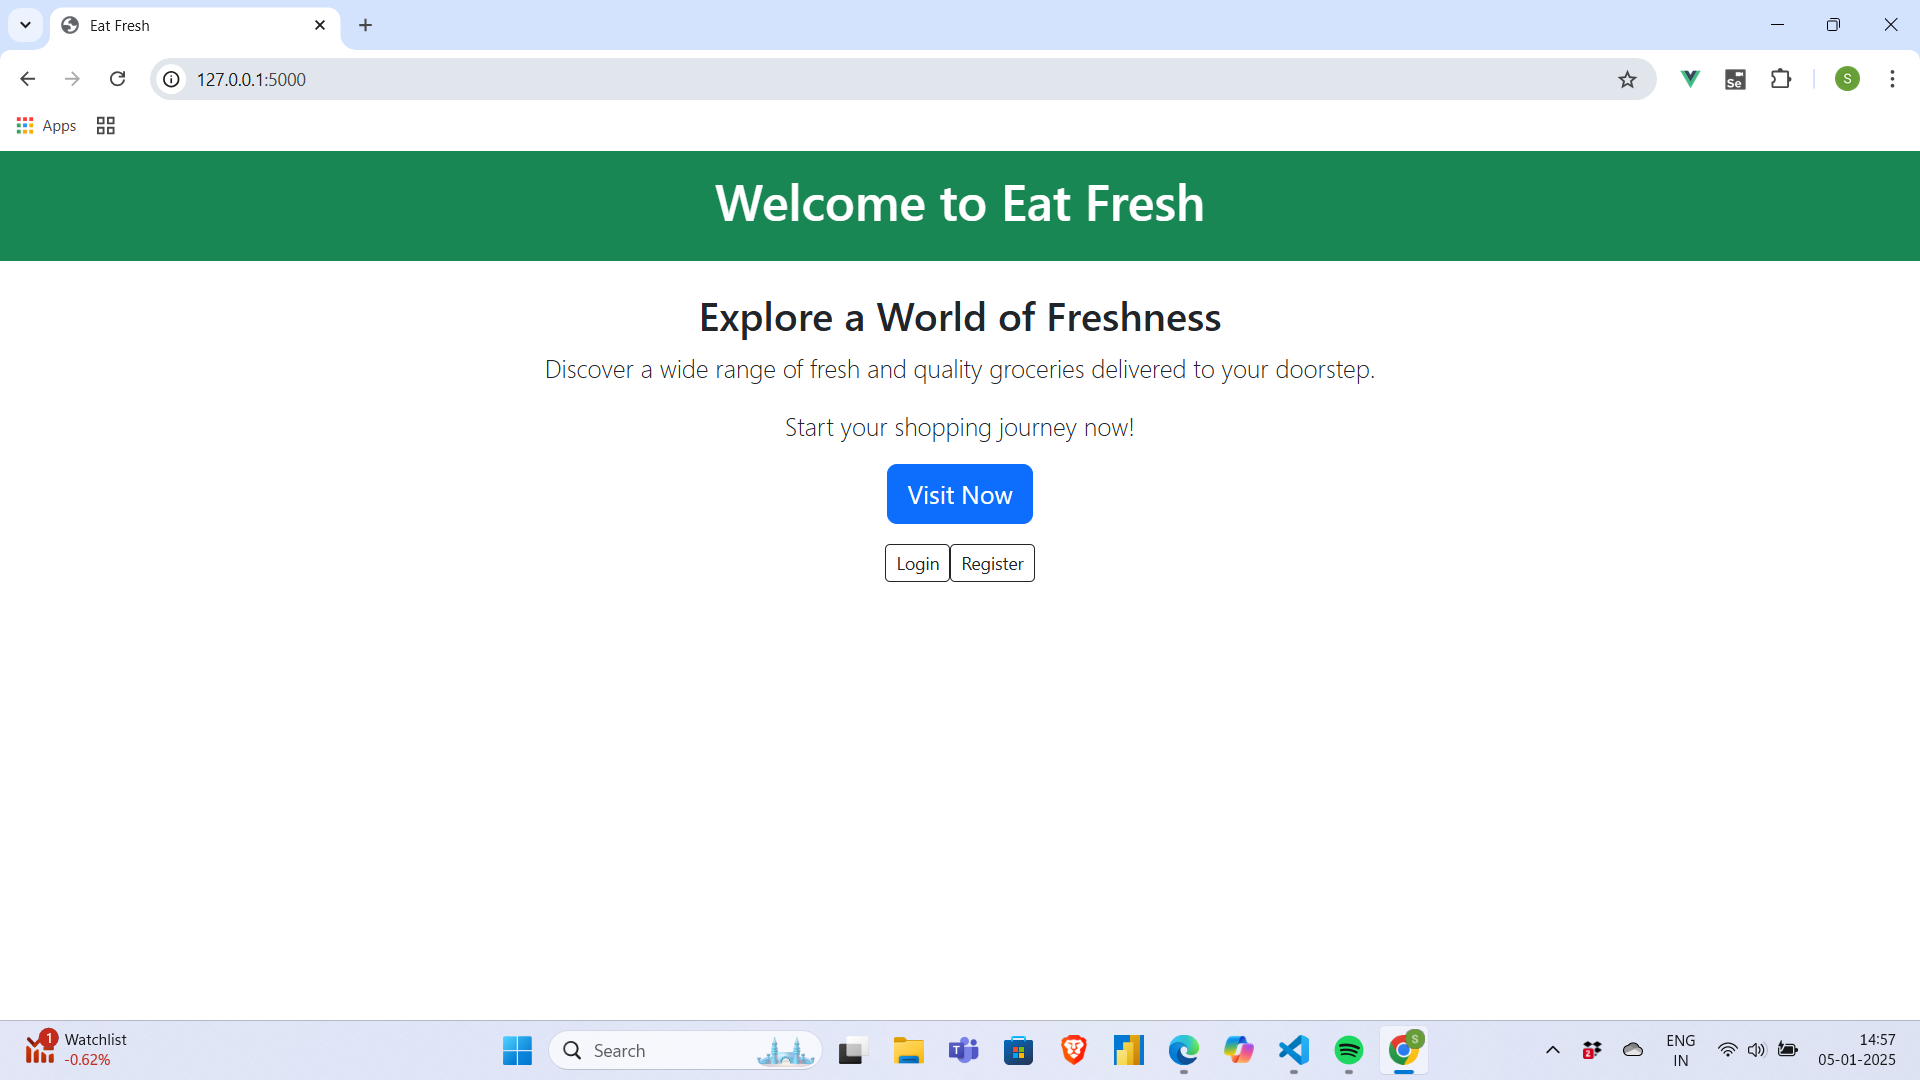
Testing it out
Now start the server and open the browser to see the landing page. Click of login or register buttons will take you to the login or register page.
python3 app.py
You will see the this as output.
Commit the changes in the local repo using the following command:
git add .
git commit -m "database configured and added login and register pages"