02. Requirements
Hello and welcome to this approach of MAD-II. In this method, we will utilize the CDN www.geeksforgeeks.org/what-is- approach to construct the application, employing Flask and Vue3 as our technology stack. This CDN method involves a single-server Flask application, where Vue3 will be served through the static folder of the Flask application. We will develop the Vue3 application within a JavaScript file inside the static folder. Best wishes for your learning journey.
Tools
Please note that the following tools are required for this project.
- Install & Setup WSL
learn.microsoft.com/en-us/windows/wsl/install
Note Only for windows users
download WSL2 with default linux distribution. Mac and Linux user can skip this.
- Install & Setup Git
git-scm.com/ - Install & Setup VS Code
code.visualstudio.com/download - Install & Setup Redis
redis.io/docs/latest/operate/oss_and_stack/install/ - Install & Setup MailHog
github.com/mailhog/MailHog - Vue DevTools
chromewebstore.google.com/detail/vuejs-devtools/nhdogjmejiglipccpnnnanhbledajbpd?hl=en-US&utm_source=ext_sidebar
We will user chrome browser as our development environment.
Frameworks
The following frameworks and their extended frameworks we will be using to create the application.
- Vue3
vuejs.org/ - Vue Router4
router.vuejs.org/ - Vuex4
vuex.vuejs.org/ - Bootstrap5
https:/cdn.jsdelivr.net/npm/bootstrap@5.3.0/dist/css/bootstrap.min.css - Flask
stableflask.palletsprojects.com/en/3.0.x/ - Flask-jwt-extended
stableflask-jwt-extended.readthedocs.io/en/stable/ - Flask-Mail
stableflask-mail.readthedocs.io/en/latest/ - Flask-SSE
stableflask-sse.readthedocs.io/en/latest/ - Flask-SQLAlchemy
stableflask-sqlalchemy.palletsprojects.com/en/latest/ - Flask-Caching
stableflask-caching.readthedocs.io/en/latest/index.html - Celery - Distributed Task Queue
stabledocs.celeryq.dev/en/stable/
Quick Setup
- Create a folder named
grocery-app-mad2you can name it whatever you want. Open the folder in VS Code. - Now open bash terminal and initialize git using the following command:
Note Please do not open command prompt, Powershell or any other Terminal separately. You can open any terminal in VS Code itself.
This will help us to manage versions of our project repository locally.
git init
- Create
.gitignorefile and add the following lines in it:
.env/
__pycache__/
celerybeat-schedule
The mentioned files/folders we will be not tracking in our git repository.
Note You will need a virtual environment
docs.python.org/3/library/venv.html#before continuing. Using virtual environment is recommended with python projects.
If you have already installed Python/Python3, pip, and python3-venv on your local machine's WSL Mac and Linux users can skip this, you may create a new virtual environment via the following command:
python3 -m venv .env
source .env/bin/activate
Create App
Install Flask
In the activated virtual environment, run the following command to install Flask flask.palletsprojects.com/en/stable/installation/#install-flask:
pip install Flask
Create a file with name app.py and add the following code:
python filename=app.py

from flask import Flask

app = Flask `__name__`

@app.route `"/"`
def hello_world ``:
    return "<p>Hello, World!</p>"

if __name__ == "__main__":
    app.run `debug=True`
Note Here
debug=Truemeans that the server will reload itself automatically when you edit the code. There are various parameters you can set for the Flask app. For more information, check out the Flask documentationflask.palletsprojects.com/en/stable/quickstart/.
Testing it out
Now to start the development server, run the following command in the activated virtual environment terminal:
python3 app.py
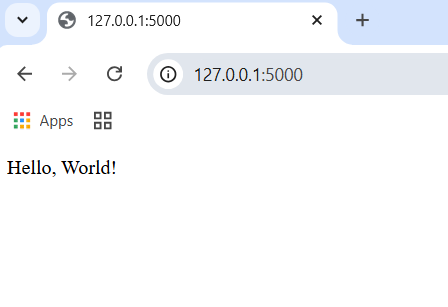
Once you have started the python development server, your application will be accessible in your web browser at http://localhost:5000 http://localhost:5000.
Running server in terminal

Running App on browser
Note At the end of each page, we will make a commit to our local Git repository, so that we can track our progress and maintain version control. We will use the following command to do so:
git add .
git commit -m "created flask server"
Continue to start creating Grocery App... landing-page.md