02. Dashboards
We will create three dashboards for different users: an admin dashboard, a manager dashboard, and a user dashboard. Additionally, we will create a landing page, a login page, and a registration page. These pages will provide the different views of the application. But first, let's take a closer look at the layout of a Vite Vue application and how it organizes its files and folders.
Layout Understanding
The current structure of the application is as follows:
front/
├── node_modules/
├── public/
├── src/
│   ├── assets/
│   ├── components/
        └── HellowView.vue
    └── App.vue
    └── main.js
    └──style.css
├── index.html
├── package-lock.json
├── package.json
├── README.md
├── vite.config.js
├── .gitignore
The src/main.js is the entry point of the Vue application and is responsible for creating the Vue app instance, as well as configuring any plugins.
The src/App.vue is the root component of the Vue application and is used to render the main content of the page.
The src/style.css file contains the global CSS styles for the application.
We will write all of our code in the src folder. Any new files or folders related to our application should be created within this folder.
This is what the folder structure looks like.
Let's update the pre written code in these files.
js filename=src/main.js

import { createApp } from "vue";
import "./style.css";
import App from "./App.vue";

const app = createApp(App);
app.mount("#app");
js filename=src/App.vue

<template>
    <div id="app">
        <router-view />
    </div>
</template>
<script>
</script>
<style scoped></style>
css filename=src/style.css
/* Delete all the codes written in this file. */
Bootstrap
We will use Bootstrap 5getbootstrap.com/ as our CSS framework, so let's install it using the following command.
npm i bootstrap@5.3.3
Now configure bootstrap with our vue application by updating the code in the main.js file.
js filename=src/main.js

import { createApp } from "vue";
import "./style.css";
import App from "./App.vue";
import "bootstrap/dist/css/bootstrap.min.css"; // [tl! add:start]
import "bootstrap/dist/js/bootstrap.min.js"; // [tl! add:end]

const app = createApp(App);
app.mount("#app");
Let's create our dashboards with a consistent overall layout, which will include a header, sidebar, main content, and footer.
Basic Layout
We will create a DashCompo.vue component to desing this basic layout.
js filename=src/views/DashCompo.vue
<template>
<div>
<nav class="navbar navbar-expand-lg navbar-dark bg-success">
<div class="container">
<a class="navbar-brand" href="#">Eat Fresh</a>
<button class="navbar-toggler" type="button" data-bs-toggle="collapse" data-bs-target="#navbarNav"
aria-controls="navbarNav" aria-expanded="false" aria-label="Toggle navigation">
<span class="navbar-toggler-icon"></span>
</button>
<div class="collapse navbar-collapse" id="navbarNav">
<ul class="navbar-nav ms-auto">
<li class="nav-item">
<a class="nav-link pointer-on-hover" @click="closeCard">Home</a>
</li>
<slot name="menu"></slot>
<li class="nav-item">
<a class="nav-link pointer-on-hover" @click="logout">logout</a>
</li>
</ul>
<!-- Search Bar -->
<form class="d-flex ms-auto" @submit.prevent="search">
<input class="form-control me-2" type="search" v-model="query" placeholder="Search" aria-label="Search">
<button class="btn btn-outline-light" type="submit">Search</button>
</form>
<slot name="icon"></slot>
</div>
</div>
</nav>
<main>
<div class="sidebar bg-black">
<div class="sidebar-icon mb-5">
<!-- Add your icon or content here -->
</div>
<ul class="list-group">
</ul>
<!-- Add any sidebar content here -->
</div>
<router-view></router-view>
</main>
<footer class="bg-success text-white text-center py-2">
© 2023 Eat Fresh. All rights reserved.
</footer>
</div>
</template>
<script>
export default {
data() {
return {
/* write your code here */
};
},
methods: {
/* write your code here */
},
mounted() {
/* write your code here */
}
}
</script>
The above template is the basic layout of all the three different dashboards. One more thing that I want to include in this application other than the bootstrap is icons. For that, we will use fontawesome icons. You can see the full guidance to use fontawesome in the fontawesomefontawesome.com website.
Note We will be using all the free icons from the fontawesome
fontawesome.comwebsite.
Here is the complete setup as per the current docs. We will follow the instruction of integration of fontawesome icons with vuedocs.fontawesome.com/web/use-with/vue.
You can find all the free icons from the fontawesomefontawesome.com/icons?d=gallery&p=2&m=freewebsite.
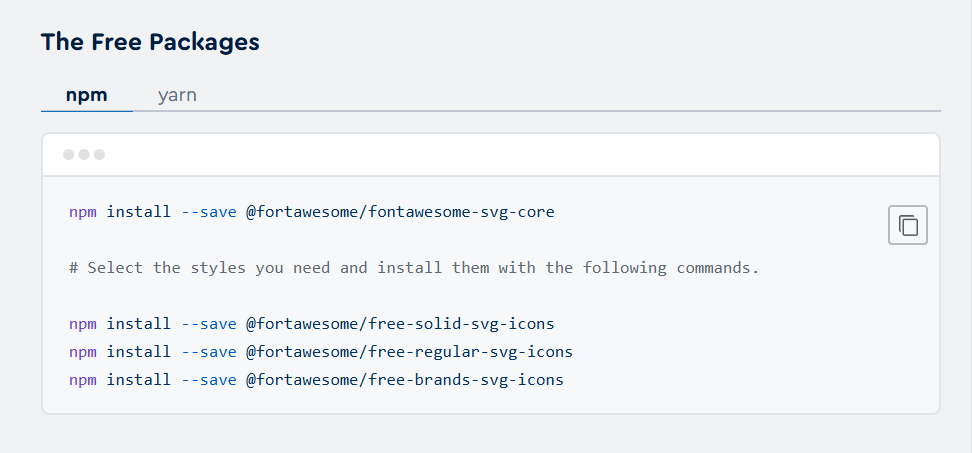
Let's install the solid fontawesome icons using the following command.
npm install --save @fortawesome/fontawesome-svg-core
npm install --save @fortawesome/free-solid-svg-icons
npm i --save @fortawesome/vue-fontawesome@latest-3
`
We will keep installing other packages as per our need.
Let's configure the icon with our vue application.
js filename=src/main.js

import { createApp } from "vue";
import "./style.css";
import App from "./App.vue";
import "bootstrap/dist/css/bootstrap.min.css";
import "bootstrap/dist/js/bootstrap.min.js";

/* import the fontawesome core */ // [tl! add:start]
import { library } from "@fortawesome/fontawesome-svg-core";
import { FontAwesomeIcon } from "@fortawesome/vue-fontawesome";
import { faBell } from "@fortawesome/free-solid-svg-icons";
library.add(faBell); // Add the bell icon to the library // [tl! add:end]

const app = createApp(App);
app.component("FontAwesomeIcon", FontAwesomeIcon); // [tl! add]
app.mount("#app");
Creating the admin, manager and user dashboards using the base layout will help us to manage and maintain the code.
Admin Dashboard
js filename=src/views/AdminDash.vue

<template>
  <DashCompo>
    <template v-slot:menu>
      <li class="nav-item">
        <a class="nav-link pointer-on-hover">Add category</a>
      </li>
      <li class="nav-item">
        <a class="nav-link pointer-on-hover">Add product</a>
      </li>
      <li class="nav-item">
        <a class="nav-link pointer-on-hover">Managers</a>
      </li>
      <li class="nav-item">
        <a class="nav-link pointer-on-hover">stats</a>
      </li>
    </template>
    <template v-slot:icon>
      <a class="nav-link pointer-on-hover ms-auto position-relative">
        <FontAwesomeIcon :icon="['fas', 'bell']" style="font-size: 1.5rem; color: white;" />
        <!-- Badge for cart items -->
        <span class="badge bg-danger position-absolute top-0 start-100 translate-middle">
        </span>
      </a>
    </template>
    <template v-slot:edit>
      <a class="pointer-on-hover">edit</a>
    </template>
  </DashCompo>
</template>

<script>
import DashCompo from './DashCompo.vue'
export default {
  components: {
    AdminDash
  },
  data() {
    return {
      {/* write your code here */}
    };
  },
  methods: {
    /* write your code here */
  },
  mounted() {
    /* write your code here */
  }
}
</script>
<style scoped></style>
Manager Dashboard
js filename=src/views/ManagerDash.vue

<template>
  <DashCompo>
    <template v-slot:menu>
      <li class="nav-item">
        <a class="nav-link pointer-on-hover">Add category</a>
      </li>
      <li class="nav-item">
        <a class="nav-link pointer-on-hover">Add product</a>
      </li>
      <li class="nav-item">
        <a class="nav-link pointer-on-hover">stats</a>
      </li>
    </template>
    <template v-slot:icon>
      <a class="nav-link pointer-on-hover ms-auto position-relative">
        <FontAwesomeIcon :icon="['fas', 'bell']" style="font-size: 1.5rem; color: white;" />
        <!-- Badge for cart items -->
        <span class="badge bg-danger position-absolute top-0 start-100 translate-middle">
        </span>
      </a>
    </template>
    <template v-slot:edit>
      <a class="pointer-on-hover">edit</a>
    </template>
  </DashCompo>
</template>

<script>
import DashCompo from './DashCompo.vue'
export default {
  name: "ManagerDash",
  components: {
    DashCompo
  },
  methods: {
    /* write your code here */
  },
  mounted() {
    /* write your code here */
  }
}
</script>
User Dashboard
js filename=src/views/UserDash.vue

<template>
  <DashCompo>
    <template v-slot:menu>
      <li class="nav-item">
        <a class="nav-link pointer-on-hover">Your Orders</a>
      </li>
      <li class="nav-item">
        <a class="nav-link pointer-on-hover">Refer</a>
      </li>
    </template>
    <template v-slot:icon>
      <a class="nav-link pointer-on-hover ms-auto position-relative">
        <!-- Badge for cart items -->
        <FontAwesomeIcon :icon="['fas', 'shopping-cart']" style="font-size: 1.5rem; color: white;" />
        <span class="badge bg-danger position-absolute top-0 start-100 translate-middle">
        </span>
      </a>
    </template>
  </DashCompo>
</template>

<script>
import DashCompo from './DashCompo.vue'
export default {
  name: "UserDash",
  components: {
    DashCompo
  },
  methods: {
    /* write your code here */
  },
  mounted() {
    /* write your code here */
  }
}
</script>
We also create a welcome or landing page of the application.
Landing Page
js filename=src/views/LandPage.vue

<template>
  <div>
    <header class="bg-success text-white text-center py-3">
      <h1>Welcome to Eat Fresh</h1>
    </header>

    <section class="container mt-4">
      <div class="text-center">
        <h2>Explore a World of Freshness</h2>
        <p class="lead">Discover a wide range of fresh and quality groceries delivered to your doorstep.</p>
        <p class="lead">Start your shopping journey now!</p>

        <!-- Visit Now Button with Tooltip -->
        <button type="button" class="btn btn-primary btn-lg" data-bs-toggle="tooltip" data-bs-placement="bottom"
          title="Please login or register to continue.">
          Visit Now
        </button>

        <!-- Login and Register Buttons -->
        <div class="mt-3">
          <a class="btn btn-outline-dark btn-sm" @click="login">Login</a>
          <a class="btn btn-outline-dark btn-sm" @click="register">Register</a>
        </div>
      </div>
    </section>
  </div>
</template>

<script>
export default {
  methods: {
    login() {
      if (this.$route.path != '/login') {
        this.$router.push('/login')
      }
    },
    register() {
      if (this.$route.path != '/register') {
        this.$router.push('/register')
      }
    },
  },
  mounted() {
    this.fetchUser()
  }
}
</script>
So far, we have created the basic core pages of the application in our frontend app. Now, we will create routes in the frontend app using the vue extended framework vue-router. Since we are creating our app as frontend, the way we have routes/paths in the MAD-application, we create routers in the frontend app. We will use the vue extended framework vue-router to create routers.
Routers
Installation
The way we install the vue, same we will have to install vue-router in the frontend app using our npm package manager.
npm install vue-router@4
We wll create a folder in the src folder with name router. In this router folder we will create a file named index.js.
js filename=src/router/index.js
import { createRouter, createWebHistory } from 'vue-router';

const routes = [
  {
    path: '/',
    name: 'LandPage',
    component: () => import('../views/LandPage.vue'),
  },
  {
    path: '/login',
    name: 'Login',
    component: () => import('../views/LoginPage.vue'),
  },
  {
    path: '/register',
    name: 'Register',
    component: () => import('../views/RegisterPage.vue'),
  },
  {
    path: '/admin',
    component: () => import('../views/AdminDash.vue')
  },
  {
    path: '/manager',
    component: () => import('../views/ManagerDash.vue')
  },
  {
    path: '/user',
    component: () => import('../views/UserDash.vue')
  },
];

const router = createRouter({
  history: createWebHistory(),
  routes,
});
export default router;
We have created routers for almost all of our pages in the views folder. There are various ways to access route in vue-router. For more info you can follow the official docs hererouter.vuejs.org/.
Configuration & Setup
Integrating an extended framework of a vue is very simple. You can import the router instance and make you vue root app to use it by just writing these few lines of code.
js filename=src/main.js

...
import router from './router'
...
app.use(router)
That's all the code you need to write to integrate Vue and Vue Router.
State Management
One more vue-extended framework we will be using is VueX. VueX helps us to manage our state in our application and make our application reactive. You can refer this doc for more information herevuex.vuejs.org/guide/.
Installation
Let's install vueX using the following command.
npm install vuex@next --save
Let's create a folder named store in the static folder. Let's create a file named index.js in this folder.
js filename=static/store/index.js

const store = new Vuex.Store({
  state: {
    // write your code here
  },
  getters: {
    // write your code here
  },
  mutations: {
    // write your code here
  },
  actions: {
    // write your code here
  },
});
export default store;
Configuration & Setup
js filename=src/main.js

...
import store from './store';
...
app.use(store)
So far we have setup all the dependencies of the frontend app which is required for our frontend. Now we will move further and create rest of the components in the frontend app.
Testing it Out
Now you can start the frontend app using the following command.
npm run dev
After that, you can open your browser and navigate to http://localhost:5173 to see your fresh app.
By default the moment you create a vite application it initialized a git repo. So you can use git commands to track your progress.
Let's commit the change using the following command.
git add .
git commit -m "first commit"